My last two quick posts have been about my son's wedding. It is so different when a son gets married-there is much less involvement by the mother of the groom. So I was tickled as could be when Elise allowed me to make the ring bearer pillow and the flower girl basket.
I know this has nothing to do with quilting, but sometimes we are creative in other ways and I decided to share this too.
I found a cute ring-bearer pillow on Martha Stewart's wedding website and decided to make it in white linen. The fabric I purchased seemed very thin and limp, so I also used a very thin fusible interfacing on the back to give it some body. I was really pleased with the way it turned out. I made a small change to the pattern by adding an additional strip of fabric across the center back for a "handle".

My four year old granddaughter, Sofie, was the flower girl and my daughter (her mom) was making her dress. She was also making a tie out of the dress fabric for the ring-bearer (the 4 year old nephew of the bride). I used a piece of the same fabric as a flange on the pillow to tie it all together.
Once I finished the ring-bearer pillow I began a search for a cute flower girl basket idea. Nothing I found was exactly what I wanted to make and since time was ticking away I decided to just design it myself.
I decided to start with a basic round shape that was flared at the top. I looked at several craft stores for something that was the shape and size I wanted to use as a base. I ended up buying this small tin....

I started off by covering the outside with two layers of thin white batting. I laid the tin on the batting and rolled it across the surface so that I would have the right shape to use. I attached it with hot glue.

I measured the tin from the top edge on one side, down that side, across the bottom, and back up on the opposite side. That told me the size circle that I needed to cut to make the outside of the basket. Since I don't draw very good circles, I can usually find something in my house that is the right size to use as a template. In this case, it was a plastic cake carrier cover :). I put it on the fabric and drew my circle and cut it out, then ran two rows of gathering threads around the top. I gathered the circle and hot glued it around the top edge of the tin.
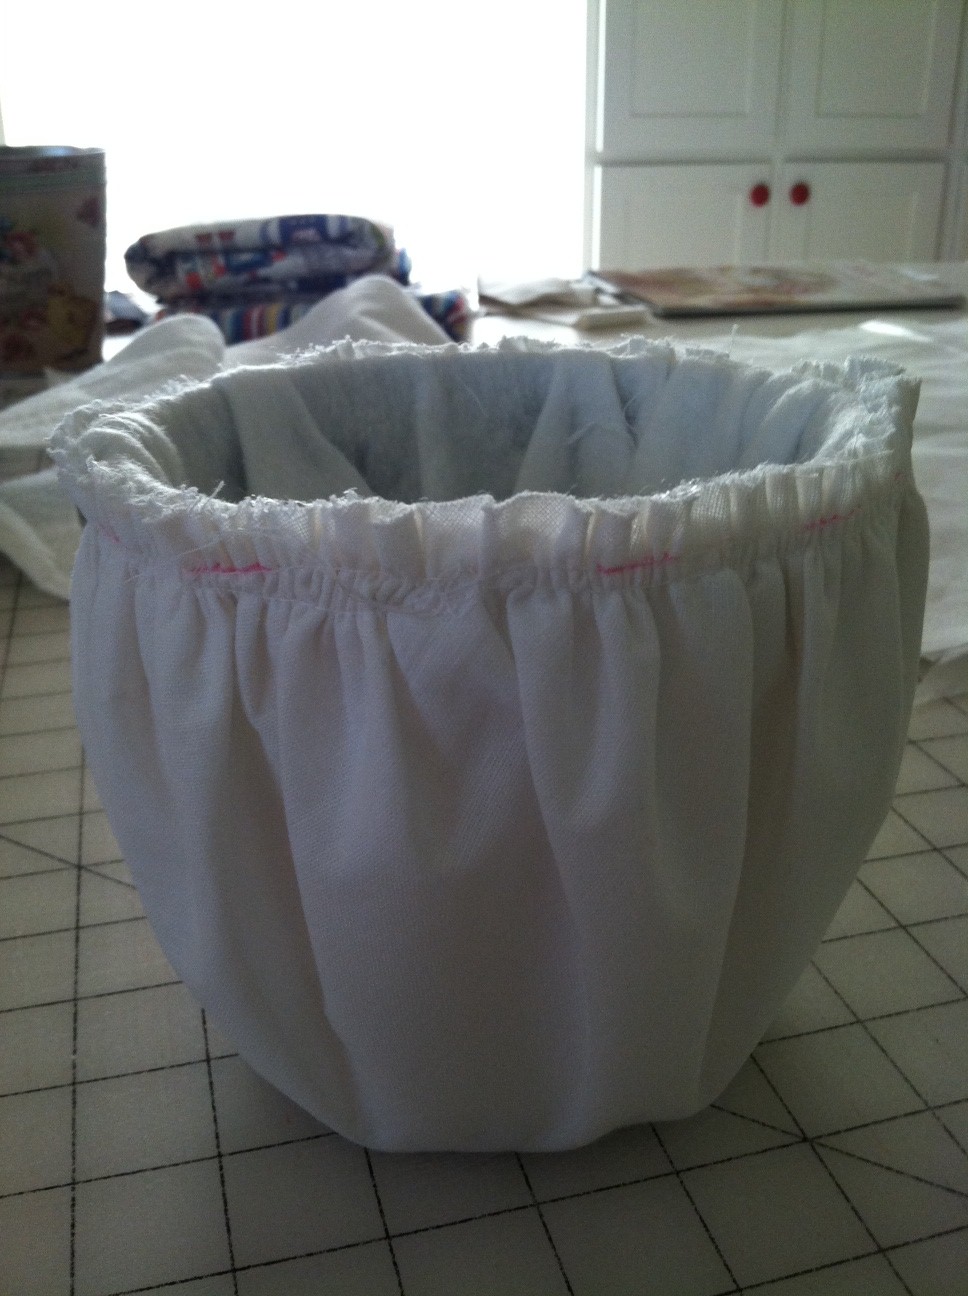
The next step was the inside. First I cut a circle of batting and lined the inside. In hindsight, I wish that I had skipped this step-I thought it made the inside too "thick". Next I gathered a second circle of fabric, gathered it, put it on the inside of the tin and then glued it around the top.

See what I mean? If I had more fabric and more time, I probably would have taken the lining out and redone it. I cut a circle out of cardboard, covered it with fabric and put it in the bottom to hold the lining in place.
To finish the top edge I made a band to go around the top. I handstitched it to the outside and glued it to the inside.

Next I used the same ribbon that I used on the ring-bearer pillow to trim the basket. I made a handle and attached it with pearl buttons. Here is the end result.

And of course, I forgot to take a picture of the ring-bearer and the flower girl together at the wedding-but I promise you, they were precious walking up the aisle.


No comments:
Post a Comment